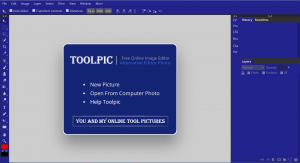
Hello, everyone. I’m Xiaoxin. I will share with you the image size adjustment panel of Photoshop today.
There are many ways to adjust the image size. https://www.toolpic.com/sources/
One: Through the adjustment method of the image menu, there are some image adjustment options in the image menu. Shortcut key (ctrl+ait+i).
1: Open the toolpic software, open a picture, we can directly drag the picture to ps, or press the ctrl+o key on the keyboard to open the image.
Open a picture
By default, ps will automatically be displayed as a state where you can see the complete picture.
When we drag the picture into ps, how big is this picture? At this time, we can look at the lower left ratio of ps. As shown below.
How big is this picture
2: The size of the picture here is only 16.67%, indicating that the picture is shrunk very small. It is large under normal circumstances. Here we can double-click the magnifying glass tool to make the image display 100%. The most optimized display.
Optimal display
Here we directly double-click the magnifying glass tool twice instead of selecting the magnifying glass tool and clicking on the image. Friends, don’t make a mistake. At this time, let’s look at the load ratio of the image. This shows that this picture is already very big.
Double-click the magnifying glass tool directly instead of selecting the magnifying glass tool and clicking on the image
For many things, whether we take pictures ourselves or download pictures online, we need to adjust the size in ps. Especially in this era of self-media, image resizing is one of the skills that everyone needs to master. So here we have to learn how to adjust the image size.
Two: Here is how to adjust the image to open. Click image-image size. As shown below.
Adjust how the image is opened
In the early version of 2017pscc, the image size adjustment panel is different from the current panel. The early version has a “constrained ratio”, but this text is not displayed since 2017pscc. It is embodied in a connected way. As shown below.
Constraint ratio
1: Click this link to connect the width and height together, so that when we adjust the width, the height will change proportionally. As shown below.
Click this connection width and height to connect together
Click this connection width and height to connect together
Here no matter how many times we zoom in or out, the ratio of the image is the same, and the aspect ratio will not change. This is the role and benefit of connecting width and height.
2: Click again to cancel the width and height connection. At this time, when we adjust the value of a certain parameter in the width and height, the other parameter value will not change with it. Here we adjust the width value to 100 pixels, the height does not change. The image is compressed horizontally. As shown below.
Cancel wide and high connection
This is the result of canceling the connection constraint ratio of width and height. The change will not be obvious when adjusting the landscape image. When we adjust the portrait, the character will be deformed and lose the original proportion. Therefore, the friends here must remember to open the constraint ratio connection, especially the friends who adjust the portrait.
3: In the image size, in addition to adjusting the width and height of the image, we can also adjust the resolution of the image. As shown below.
Adjust the resolution of the image
Here, when we change the width and height, it is best not to change the resolution. When we change the resolution, the width and height should not be changed. This can make the image not very blurry after adjustment, unless the friends have special requirements.
4: Press and hold the AIT button on the keyboard and don’t release it. The cancel button below will become reset. At this time, click reset and the parameters we just set will be restored to the initial settings. As shown below.
Press and hold the AIT button on the keyboard and do not release it, the cancel button below will become reset
5: When the resolution changes during adjustment, the width and height also change. Here, when we adjust the resolution to half of 150, the width and height are also reduced by half. As shown below.
When the resolution changes, the width and height also change
When we have adjusted it, click OK.
6: When the image is resized, it is the most commonly used to adjust the large image to the small image, and it is not recommended for small friends to adjust the large image.
Because there are so many pixels in a small image, zooming in only enlarges the pixels instead of increasing the pixels, so when we zoom in, we will find that the image is blurry and unclear.
Seeing here, do you understand the image size adjustment? I hope today’s sharing is helpful to everyone.
I will share it with you today! How much did everyone learn here? Share your results today in the comment area, see you in the comment area.


