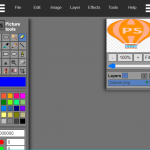
 At first glance, Adobe Photoshop seems a bit unbearable. Because it is so versatile, with so many powers, tools, and resources, it seems complicated for novices. The key is to find high-quality Photoshop skills and practice as much as possible. Considering that Photoshop is such a standard in the creative world, this is worth your time to think about: According to Adobe, more than 90% of creative professionals in the world use Photoshop to some extent. We have introduced you to a list of some of the most important tools, which are for beginners. Keep reading, the first step in becoming an expert in the world’s most powerful image editing tool!
1. Set up the document
You will be pleased to know that Photoshop comes with a bunch of presets that allow you to easily set up your documents. However, if you fiddle with these options and numbers, you will notice the main difference between print and web settings. This will help the user to create a suitable document. In the document settings, you can also specify landscape mode or portrait mode for the shape of the image. Here, you can switch between measurement units, such as pixels or inches. You can also name the working document, which will be transferred to the exported or saved document later. Rely on presets as much as possible (without making any changes), because they are developed by professionals and are the most practical solutions.
2. Lasso tool
If you need to edit part of the picture, the lasso tool will be very useful. This tool will allow you to outline parts of an image to edit it without applying these changes to anything outside of the created border. Hold down the mouse and click, the lasso tool options will expand. Then you can switch to the magnetic lasso tool, which is particularly useful: the magnetic lasso recognizes the edges of the object, making it easier to segment.
3. Dodge tool
If you need some enhancements, such as brightening someone’s eyes, the dodge tool will become your first choice. This tool gradually brightens the image based on the time you let it activate on the image. Like most tools, you can choose the size and shape of the cursor to customize the effect. Use the Dodge tool on shadows and dark colors to see its full effect.
4. Deepen tool
Contrary to the dodge tool, the burn tool will help you make the image darker according to your settings and usage. This is an excellent resource for creating shadows and manipulating color images to achieve a specific look. If your image is projected in a too harsh light, but only in a specific area; without applying filters to the entire image, you can easily modify small parts.
5. Transform
You can use Ctrl+T on Windows or Command+T on Mac (or select from the drop-down menu) to convert the image to a new size. Suppose you have put a logo or image on your project, but it is too small. A quick transformation will allow you to expand or shrink the image by dragging out the edges. Maybe the image or logo you imported is upside down: to correct it, convert the image, then click and drag the indicator box below. You can rotate the image around 360 degrees until you are satisfied with the positioning.
6. Magic Wand Tool
If you have ever encountered the word “magic” in any Adobe platform tool, then you will definitely find something great. The magic wand tool helps you gradually select a part of the image. As you move the cursor, the tool will notice the color change and find new boundaries for a cleaner selection.
7. Magic eraser
This magic eraser can help you replace certain colors or images on your drawing board. By using this tool on the image, you can delete all other objects with the same color. If your background is still set to transparent, clicking on the magic eraser of an object will show the transparent background below. This is useful, for example, when deleting a blue sky to replace a fashionable texture or pattern.
8. Crop
Cropping an image will allow you to select part of the project to become a new image. By selecting, you can delete anything outside the new border in one action. This is useful for removing people who do not want to appear in the final image from the picture, or for isolating a building in a picture of a downtown skyscraper.
9. Mask tool
By creating a layer mask, you can delete or change the color of certain elements, make objects pop out, and build depth. This mask tool has many functions, so once you find it, you can explore its possibilities in depth!
Please indicate:Free Editor Online Photoshop » Nine Photoshop tips that beginners need to know


 Gender Double Label Revealed 9 Illustrations Reveal the Invisible Rules Around Us!


Login to comment! If you already have an account, please first log in,No please registered or