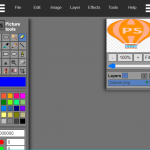
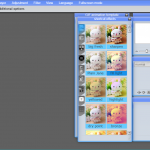
Today I would like to share with you a set of 58 super practical PS tips, suitable for beginners to get started!
1. Open files quickly
Double-click the background blank of Photoshop (the gray display area by default) to open the browse window for selecting files.
2. Change the canvas color at will
Select the paint bucket tool and hold down Shift and click on the edge of the canvas to set the background color of the canvas to the currently selected foreground color. If you want to restore to the default color, set the foreground color to 25% gray (R192, G192, B192), hold down Shift and click on the edge of the canvas again.
3. Shortcut keys for selection tools
You can quickly select a tool in the toolbox by pressing the shortcut key. The alphabetic shortcut keys for each tool are as follows:
Marquee-M Move-V Lasso-L Magic Wand-W
Airbrush-J Paintbrush-B Pencil-N Rubber Stamp-S
History Brush-Y Eraser-E Blur-R Dodge-O
Pen-P Text-T Measurement-U Gradient-G
Paint bucket-K straw-I gripper-H zoom-Z
Default foreground and background color -D Switch foreground and background color -X
Edit mode switch-Q Display mode switch-F
In addition, if we hold down the Alt key and then click the displayed tool icon, or hold down the Shift key and repeatedly press the letter shortcut keys, we can cycle through the hidden tools.
4. Get precise cursor
Press the Caps Lock key to make the cursor of the pen and magnetic tool display a precise crosshair, and press it again to restore the original shape.
5. Show/Hide Control Panel
Press Tab to switch to show or hide all control panels (including toolbox). If you press Shift+Tab, the toolbox will not be affected, only other control panels will be displayed or hidden.
6. Quickly restore default values
Some friends who are not good at Photoshop really have to go through many twists and turns in order to adjust the satisfactory effect, and the result is that the original default effect is the best. This is dumbfounded, and I regret it! How to restore to the default value? Try tapping the tool icon on the options bar, then choose “Reset Tools” or “Reset All Tools” from the context menu.
7. Freely control the size
The shortcut key of the zoom tool is “Z”, in addition, “Ctrl+Spacebar” is the zoom tool, and “Alt+Spacebar” is the zoom tool, but you can zoom with the mouse click; the same press Ctrl+”+” key and “-” key You can also zoom in and zoom out the image respectively; Ctrl+Alt+”+” and Ctrl+Alt+”-” can automatically adjust the window to full-screen zoom display. With this tool, you can use this tool regardless of the percentage of the picture to be displayed. Browse in full screen! If you want to automatically adjust the window according to the size of the picture when using the zoom tool, you can click the “Full canvas display” option in the property bar of the zoom tool.
8. When using a non-Hand Tool (hand tool), press and hold the space bar to convert it into a hand tool, and you can move the visible range of the image in the window. Double-click the mouse on the hand tool to display the image in the most suitable window size, and double-click the mouse on the zoom tool to display the image in a 1:1 ratio.
9. When using the Erase Tool (erase tool), press and hold the Alt key to switch the eraser function back to the specified step recording state.
10. When using the Smudge Tool (fingertip tool), hold down the Alt key to change from pure smudge to foreground smudge.
11. If you want to move the selected range of fonts typed with the Type Mask Tool, you can switch to the quick mask mode (switch with the shortcut key Q), and then move, and then switch back to the standard mode when you are done. That’s it.
12. After holding down the Alt key, use the Rubber Stamp Tool to click the mouse in any open image window to set the sampling position in the window, but the active window will not be changed.
13. When using the Move Tool, you can press the arrow keys on the keyboard to directly move the image on the layer at a distance of 1 pixel. If you hold down the Shift key and then press the arrow keys, the image will be moved by 10 pixels each time. Move the image from the distance. While pressing the Alt key to drag the selection will move the copy of the selection. “Button can increase or decrease the sampling width in real time (in the option palette).
15. The measuring tool is very convenient for measuring distance (especially on oblique lines), and you can also use it to measure angles (just like a protractor). Under the premise that the information panel is visible, select the measurement tool, click and drag a straight line, hold down the Alt key and drag a second straight line from the node of the first line, so that the angle between the two lines is the same as the line The length is displayed on the information panel. Drag with the measurement tool to move the measurement line (you can also move only one node of the measurement line), and drag the measurement line outside the canvas to delete it.
16. Use painting tools such as (such as paintbrush), hold down the Shift key and click the mouse to connect the two clicked points in a straight line.
17. Hold down the Alt key and select a color with the eyedropper tool to define the current background color. Monitor the color change of the current picture by combining the color sampler tool (Shift+I) and the information panel. The color value before and after the change is displayed next to the sampling point number on the information panel. The color mode of the sampling point can be defined through the pop-up menu on the information panel. To add a new sampling point, just click anywhere on the canvas with the color sampler tool, hold down the Alt key and click to remove the sampling point. However, at most four color sampling points can be placed on a picture. When a dialog box (such as level command, curve command, etc.) pops up in Photoshop, you must hold down the Shift key and click to add a new sample point. Hold down Alt+Shift and click to subtract a sample point.
18. Everyone must have used the crop tool, and you must have encountered this situation; when you adjust the crop and the crop frame is closer to the image boundary, the crop frame will automatically be attached to the edge of the image , So you can’t crop the image accurately. But as long as you press the “Ctrl” key when adjusting the cropping frame, the cropping frame will be compliant, allowing you to cut accurately.
19. Hold down the Ctrl+Alt keys and drag the mouse to copy the contents of the current layer or selection.
20. If you recently copied a picture and saved it in the clipboard, Photoshop will use the size of the picture in the clipboard as the default size when creating a new file (Ctrl+N). To skip this feature and use the last setting, hold down the Alt key (Ctrl+Alt+N) when opening it.
21. If you create a new work, you need a file with the same size, resolution, and format as an opened picture. Choose “File” → “New”, click the Windows option in the Photoshop menu bar, and click the name of the opened picture in the bottom column of the pop-up menu. Yes, it’s that simple!
22. When using the free transform tool (Ctrl+T), hold down the Alt key (Ctrl+Alt+T) to copy the original layer (in the current selection) and then transform on the copied layer; Ctrl+Shift+T To execute the last transformation again, Ctrl+Alt+Shift+T is to copy the original image and then execute the transformation.
23. Use the “Create a new layer by copying (Ctrl+J)” or “Create a new layer by cutting (Ctrl+J)” command to complete the copy-to-paste and cut-to-paste work in one step; by copying (cutting ) The new layer command will still be placed in their original place when pasting, but by copying (cutting) and then pasting, it will be pasted to the center of the picture (or selection).
24. If you want to copy the image directly without the naming dialog box, you can hold down the Alt key first, and then execute the “Image” → “Copy” command.
25. Photoshop’s clipboard is very easy to use, but you prefer to use the Windows system clipboard directly to directly process the images taken from the screen. Okay, press Ctrl+K, and click “Output to Clipboard” on the pop-up panel!
26. Realize regular copy in Photoshop
When doing layout design, we often place certain elements regularly in order to find a form of beauty, which can be easily obtained by a combination of four shortcut keys in Photoshop.
(1) Circle the object you want to copy;
(2) Press Ctrl+J to generate a floating Layer;
(3) Press to rotate and move to the appropriate position to confirm;
(4) Now you can press Ctrl+Alt+Shift and then press “T” continuously to copy continuous objects regularly. (Just hold down Ctrl+Shift to move regularly)
27. When we want to copy the selected object in the file, we need to use the copy command in the edit menu. You may not find it troublesome to copy once, but it is quite inconvenient to copy it multiple times with one click. At this time, you can first use the selection tool to select the object, then click the move tool, and then hold down the “Alt” key. When the cursor turns into two overlapping arrows, one black and one white, just drag the mouse to the desired position. If you want to copy multiple times, just relax the mouse repeatedly.
28. You can use the marquee tool or the lasso tool to drag the selection from one document to another.
29. To create a copy file for the current historical state or snapshot:
(1) Click the “Create a new document from the current state” button;
(2) Select a new document from the history panel menu;
(3) Drag the current state (or snapshot) to the “Create a new document from current state” button;
(4) Right-click the desired state (or snapshot) and select New Document from the pop-up menu. Drag a certain historical state of the current picture in the historical state to the window of another picture to change the content of the destination picture. Hold down the Alt key and click on any history state (except the current and recent state) to copy it. Then the copied state becomes the current (recent) state. Hold down Alt and drag a step in an action to copy it to another action.
30. When dragging the selected area or layer from one document to another, hold down the Shift key to center it on the destination document. If the size (dimensions) of the source document and the destination document are the same, the dragged element will be placed at the same place as the source document (rather than at the center of the canvas). If the target document contains a selection, the dragged element will be placed in the center of the selection.
31. Click the triangle button in the upper right corner of the action palette, select Load Action from the pop-up menu, and enter the PhotoshopGoodiesActions directory. There are six buttons, specifications, commands, image effects, text effects, textures, and frames under it. The action set contains a lot of useful things! In addition, there is an ACTIONS.PDF file in this directory, which can be opened with Adobe Acrobat software, which introduces the usage and effects of these actions in detail.
32. Click the brush tool in the toolbar, click the small triangle on the right of the brush label in the property bar that is displayed afterwards, and then click the small arrow in the pop-up menu to select “Load Brush…”. Go to the Brushes folder of the Photoshop directory and select *.abr. It turns out there are so many lovely things here.
33. Draw a beautiful mark and want to reuse it in your work? Easy to handle, use the lasso tool to select it, select “Save Brush…” in the pop-up menu of Brushes, and then use the brush tool to select this new pen tip… Friends, do you want to do room spraying?
34. If you want to select the part between two selection areas, hold down the Shift and Alt keys while dragging next to any existing selection area, and draw the second selection area (a multiplication sign appears beside the mouse cross , Which means that the overlapping area will be reserved).
35. To delete a square or circle in the selection area, first add any selection area, and then press the Alt key to drag the rectangular or elliptical mask tool in the selection area. Then release the Alt key, hold down the Shift key, and drag until you are satisfied. Then release the mouse button first and then release the Shift key.
36. Delete a selection area from the center outwards. In any selection area, first press the Alt key to drag the rectangular or elliptical mask tool, then release the Alt key and hold down the Alt key again, and finally release the mouse button again. Release the Alt key.
37. To quickly switch the mask area or select area options in the quick mask mode, hold down the Alt key and then move the cursor to the quick mask mode icon and click the mouse.
38. When using the marquee tool, hold down the Shift key to draw a selection of squares and circles; hold down the Alt key to draw a selection from the starting point as the center.
39. Use the “Reselect” command (Ctrl+Shift+D) to load/restore the previous selection.
40. When using the lasso tool to draw the selection, press the Alt key to switch between the lasso tool and the polygonal lasso tool. When drawing the selection, hold down the space bar to move the selection.
41. Hold down the Ctrl key and click on the layer’s icon (on the layer panel) to load its transparency channel, and then hold down the Ctrl+Alt+Shift key to click on another layer to select the area where the transparency channels of the two layers intersect. You can keep the original selection.
42. Show/Hide Control Panel
Press Tab to switch to show or hide all control panels (including toolbox). If you press Shift+Tab, the toolbox will not be affected, only other control panels will be displayed or hidden.
43. How to use the Shift and Alt keys in the “Select Box” tool:
When you use the “selection box” to select a picture and want to expand the selection area, hold down the Shift key at this time, the cursor “+” will change to “ten+”, drag the cursor, so that you can expand your selection on the basis of the original selection. Required selection area. Or select two or more marquee boxes in the same picture at the same time. When you use the “selection box” to select a picture, you want to subtract the extra picture from the “selection box”, then press and hold the “Alt” key, the cursor “+” will become “ten-“, drag the cursor, so that You can leave the pictures you need. When using the “selection box” to select a picture, you want to get the overlapped part of the two selection boxes, then press and hold the “Shift+Alt” key, the cursor “+” will become “十í”, drag the cursor, so that you want The essential part. When you want to get the perfect circle or square in the “marquee”, just press and hold the “Shift” key.
44. How to use the Shift and Alt keys in the “lasso” tool:
Increase the selection range and press the “Shift” key. (The method is the same as 1 in the “select box”)
Reduce the selection range and press the “Alt” key. (Method and “Select Box
Same as 2 in “)
Press the “Shift+Alt” key in the area where the two marquee boxes overlap. (The method is the same as 3 in the “select box”)
45. How to use the Shift and Alt keys in the “Magic Wand” tool:
Increase the selection range and press the “Shift” key. (The method is the same as 1 in the “select box”)
Reduce the selection range and press the “Alt” key. (The method is the same as 2 in the “select box”)
Press the “Shift+Alt” key in the area where the two marquee boxes overlap. (The method is the same as 3 in the “select box”)
46. You can use the following shortcut keys to quickly browse your images:
Home scrolls to the upper left corner of the image; End scrolls to the lower right corner of the image; Page UP scrolls to the top of the image; Page Down scrolls to the bottom of the image; Ctrl+Page Up scrolls to the left of the image; Ctrl+Page Down scrolls To the right of the image.
47. Press Ctrl+Alt+0 to display the image in a 1:1 ratio.
48. When you want to “tighten” (adjust the space between individual letters), first click between two letters, then press the Alt key and then use the left and right arrow keys to adjust.
49. To restore the settings in the dialog box to the default, after holding down the Alt key, the Cancel key will become the Reset key, and then click the Reset key.
50. To quickly change the value displayed in the dialog box, first click on that number with the mouse to place the cursor in the dialog box, and then use the up and down arrow keys to change the value. If you press the Shift key before changing the value with the arrow keys, the speed of the value change will be faster.
51. The D key and X key on the keyboard can quickly switch the foreground and background colors.
52. Add a rectangle or ellipse drawn from the center outwards. In any of the added selection areas, first press the Shift key to drag the rectangular or elliptical mask tool, then release the Shift key, then press the Alt key, and finally release Turn on the mouse button and release the Alt key. Press Enter or Return to close the slider box. To cancel the changes, press the Escape key (Esc). To increase or decrease the value in 10% increments when opening the pop-up slider dialog box, hold down the Shift key and press the up arrow key or the down arrow key.
53. To prevent the marquee from sticking to the picture frame when using the crop tool, hold down the Ctrl key while dragging the control point on the crop tool marquee.
54. Press Alt+Ctrl+Backspace to fill the selection or layer from the history, and press Shift+Alt+Ctrl+Backspace to fill the selection or layer from the history and keep the transparency setting.
55. When moving layers and selections, hold down the Shift key to move horizontally, vertically or at a 45 degree angle; press the arrow keys on the keyboard to move 1 pixel at a time; hold down the Shift key and then press on the keyboard The arrow keys can move 10 pixels at a time.
56. When creating a reference line, press the Shift key to drag the reference line to close the reference line to the scale of the ruler; press the Alt key to drag the reference line to change the reference line to horizontal or vertical orientation.
57. In the color palette, press the Shift key to click a color block, then the foreground color will replace the color; press the Shift+Alt key to click the mouse, and the foreground color will be inserted as a new color block at the clicked place; Click the Alt key on a color block to change the background color to that color; press the Ctrl key to click a color block to delete the color block.
58. When using a layer mask in the layer palette, press the Shift key and click the thumbnail of the layer mask. A red cross will appear, indicating that the current mask is disabled. Press the Alt key and click the layer mask. The thumbnail of the board, and the mask will be displayed as a whole image for easy observation and adjustment.
Please indicate:Free Editor Online Photoshop » Beginner’s guide! Super practical 58 PS tips


 Gender Double Label Revealed 9 Illustrations Reveal the Invisible Rules Around Us!


Login to comment! If you already have an account, please first log in,No please registered or