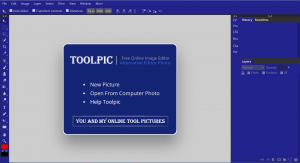
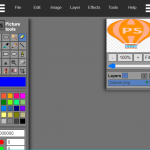
Trick 1: When you need to quickly hide the toolbar and multiple floating panels, click the close button on the panel one by one, and then open it again when you use it, which is very inconvenient. In fact, you can press the “Shift” and “Tab” keys on the keyboard at the same time, so that the floating panel will be hidden immediately and disappear from the screen, and then press the two keys at the same time, the panel will appear again; if you only press the “Tab” key , The toolbar and floating panel will be hidden together, and then press the following key, they will appear at the same time. https://www.toolpic.com/sources/

Secret Technique 2: In Photoshop, there are many times to modify the value of the setting. Generally, there will be a black triangle on the other side of the value box. Click on it and a sliding ruler will appear. Drag the ruler to modify the value, but sometimes it is not very accurate. At this time, you can press the down arrow key on the keyboard (each time you press the value plus one) and the up arrow key (each time you press the value minus one) to accurately adjust the value. If you press and hold the “Shift” key, then each time you press it, the value increases or decreases by ten.
Secret Technique 3: When you are using the brush tool and want to adjust the opacity, you have to open the setting box, which is very troublesome. At this time, you can directly press the number keys on the keyboard to set. For example, when you press the “0” key, the opacity is 100%. The “1” key is 10%. Press “4” and then “5”, then the opacity will be 45%, and so on.
Secret Four: When we want to copy the selected object in the file, we need to use the copy command in the edit menu. You may not find it troublesome to copy once, but if you need to copy multiple times, one click will be inconvenient. At this time, you can first use the selection tool to select the object, then click the move tool, and hold down “Alt” to see it. When the cursor turns into two overlapping arrows, one black and one white, just drag the mouse to the desired position. If you want to copy multiple times, just relax the mouse repeatedly.
Secret Technique 5: When we need multiple selections, we can first use the selection tool to select the area in the file, and draw a selection virtual box; then press and hold the “Alt” key, when the cursor becomes a lower right corner with a small ” When the “+” sign of -” (which means to reduce the selected area or pixels), pull out the second frame inside the first frame; then press and hold the “Shift” key, when the cursor becomes a lower right corner With a small “+” and a large “+” sign, pull out the third selection box inside the second box, so that the two can be used in turn, and multiple selections can be made. Using this method, you can also choose irregular objects, so you can experience it by yourself.
Secret Skill 6: When we edit the picture file, sometimes we have to remove the picture color outside the selected object. At this time, you can press the “Delete” key on the keyboard, and the outside of the selected area will become the background color or transparent. It depends on you What is the background content set?
Secret Technique 7: Remove the moiré patterns in the scanned image. Due to printing reasons, the pictures we input into the computer by scanning will have some moiré patterns. If processing on this basis, it will affect the future results. At this time, you can first use the “Despeckle” in the “Noise” filter to process, then the picture will become slightly blurred; then use the “Sharpen Edge” in the “Sharpen” filter (note that the setting value should be smaller) and then Deal with it, and you’re done. At this time, even if you use the magnifying tool to observe, the moiré pattern will not appear.
Secret Technique 8: After we have used Photoshop for a period of time, a large number of pictures and video files have been stored in the folder. When you want to call a file that has not been used for a long time and forget its file name, you need to open the files in the folder one by one to find it, which is too troublesome. I have a simple method: there is a Contact Sheet command in Automate under the File menu of Photoshop, which can create a small thumbnail for each file in the folder and store it in an image file, which is convenient for future Retrieval and reference save your precious time.
Please indicate:Free Editor Online Photoshop » Eight Secrets of Online Photoshop


 Gender Double Label Revealed 9 Illustrations Reveal the Invisible Rules Around Us!


Login to comment! If you already have an account, please first log in,No please registered or